| Viewing Calendar |
|
Open a Calendar item
Viewing the Calendar Folder
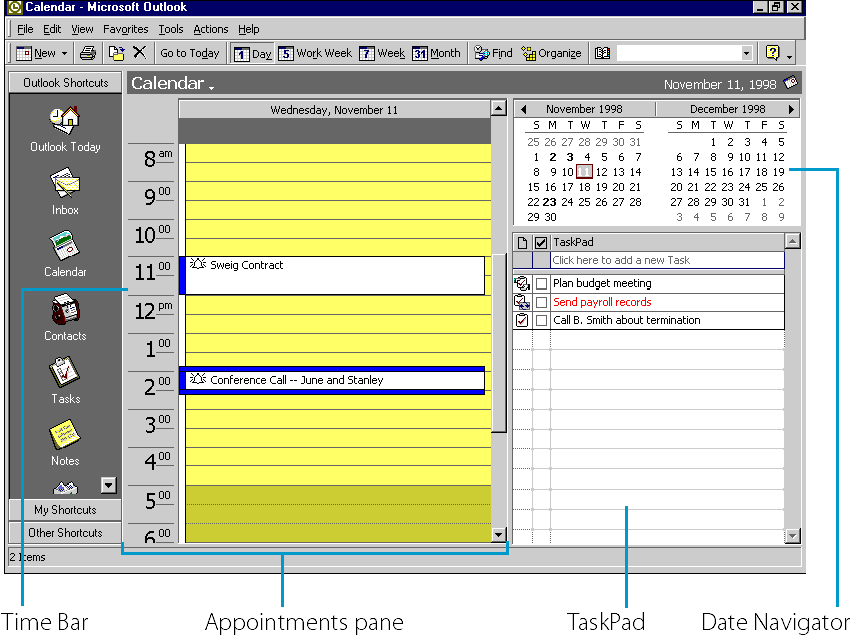
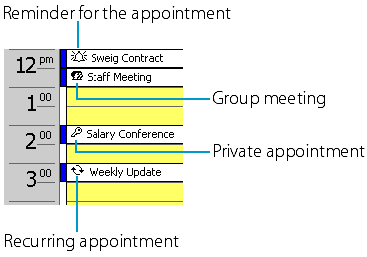
Click here to view the enlarge size Time Bar The Time Bar shows the hours of the day in half-hour increments, with working hours shown in a lighter color than nonworking hours. To see a time that's out of view, use the scroll bar located along the right side of the Appointments pane. Appointments and other calendar items, such as meetings, are shown in their appropriate time slots. Icons will appear indicating whether an entry is a group meeting, whether it is a one-time or a recurring event, whether it is private, and whether you've set a reminder for it. Outlook displays as much information about the appointment as fits. To see more details, just position the mouse pointer on the appointment for a moment to see a message box with the subject, location, and duration of the appointment. When an appointment or meeting is scheduled for a time not displayed, you'll see a yellow rectangle on the Time Bar that contains an ellipsis with a small arrow indicating which direction you need to scroll the appointments in order to bring it into view.
You can change the time interval of the Time Bar to one that's convenient for you—the intervals can be as long as 60 minutes or as short as 5 minutes. To change the time increment, take these steps:
Date Navigator Use the Date Navigator to see appointments on other dates, even months and years in advance. To display appointments for a certain date, just click the date in the Date Navigator. You can also scroll the Date Navigator to jump months ahead or back. Dates that contain appointments are shown in bold, today's date has a red box around it, and dates that are currently visible in the Calendar window are highlighted in the Date Navigator.
Using the Date Navigator Depending on the size of the Outlook window, the resolution of your monitor, and the relative size of the Date Navigator pane, you can see one or more months at a time in the Date Navigator.
Click here to view the enlarge size To jump to another date, use one of the following methods:
After you have selected a new month and jumped to it, you can repeat this method to move three months before or after the newly displayed month.
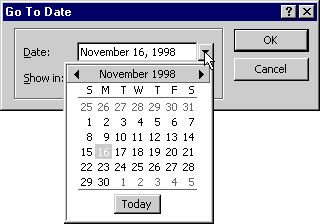
Using the Go To Date Command For dates that are further away than a few months, you'll probably want to use the Go To Date command. To jump to any date, follow these steps:
Jumping Back to Today When you've moved to a past or future date, you'll often want to jump back to today's date. You can do this quickly in any of the following ways:
Task Pad The Task Pad shows a summary of the items in Outlook's Tasks folder. Icons to the left of each task indicate one-time, recurring, or assigned tasks. Typically, the Task Pad shows your currently active tasks, including those that are overdue (shown in red instead of black) and tasks without a due date. When you click the Complete box (the check box in the second column), Outlook draws a line through the task indicating that the task has been performed. Outlook removes the completed task from the Task Pad when the due date passes.
|

|
|